Sunday, June 29, 2014

Sweet and Spicy Bacon

Today starts the first day of seven that I will be without my daughter. We have never been apart for more than two days, so seven is going to be a lot for me to handle. I am fully aware that I made decisions that put myself in this situation, but that doesn't make it any easier. When she is gone I feel like a piece of me is missing and I hate being at home... it's too quiet and lonely without her. I don't know if there is anything anyone could tell me when I am crying this week that will make me feel better. I'm not illogical... I know she will be okay and I will get through it, I know she needs to spend this time with her dad, I just know my life is better when she is around. My plan is to just stay busy and treat this week like a boot camp of excerise. It is rare I get to spend as much time as I want at the box so I am planning to go at least once a day so I can work on everything that has been on my to-do list. Exercise makes people happy naturally (yay endorphins!) and I really enjoy most of the people I workout with so I think that's where you will find me.

A Word on Nitrates

Since this is about bacon I thought I would take a second to explore the hot-button topic of "nitrate-free" bacon. I am a high school science teacher and when I saw the word "nitrate" my interest was peaked, because just like gluten, I am assuming a lot of people don't know what a nitrate is but know they want to avoid it. Nitrate is NO3 (1 nitrogen atom bonded to 3 oxygen ones.) Nitrates have uses in explosives, but for our purposes of discussing food the biggest sources of nitrates in our diet comes from all things vegetables, not bacon. Nitrates found in foods like arugula and celery are shown to reduce hypertension (high blood pressure.) There is no bacon product without nitrates... the hotdogs and bacon products labeled "nitrate free" just lack sodium nitrate, they all have a nitrate product in them, probably from celery or beets because it is needed in the curing and preserving process. Other gimmicks on bacon include saying the pigs were raised "hormone free." There are actually fairly strict laws on pigs in this country as far as hormones are concerned and they shouldn't be using them anyway. Your call on the nitrate vs. nitrate-free bacon... just know they all have nitrates in them, natural or not, and in the studies I looked up you would have to eat pounds of bacon a day to cause ill-effects from the nitrates in bacon... but then again eating pounds of bacon probably isn't good for you anyway. I would go with the so-called "nitrate-free" purely because I would like to eat the naturally occurring nitrates found in celery versus the more artificial sodium nitrate.
PS- Uncured bacon is also technically "cured"... this is the same information as above. "Uncured" bacon is bacon that has been preserved with naturally occurring nitrates (celery or sea salt) which draw out the water and preserve the meat. Cured bacon has chemicals that mimic those salts and do the same thing, usually this is sodium nitrate. Something truely "uncured" hasn't gone through the same process and wouldn't be bacon, more like ham. 

Sweet and Spicy Bacon

- 1 lb Bacon, your choice on the cut thickness
- 1/4 Cup Maple Syrup
- 1/2 tsp Cayenne Pepper

Preheat the oven to 350 degrees.

1. Mix the syrup and pepper in a bowl. Spread the bacon onto a rack over a baking sheet, this keeps the bacon from sitting in its own drippings and becoming saturated in fat, it also keeps the bacon flat so it doesn't shrivel. Brush the syrup onto the bacon.


2. Bake for 15-25 minutes depending on how thick your bacon is and how crispy you want it. Eat it immediately or store it for breakfast all week.

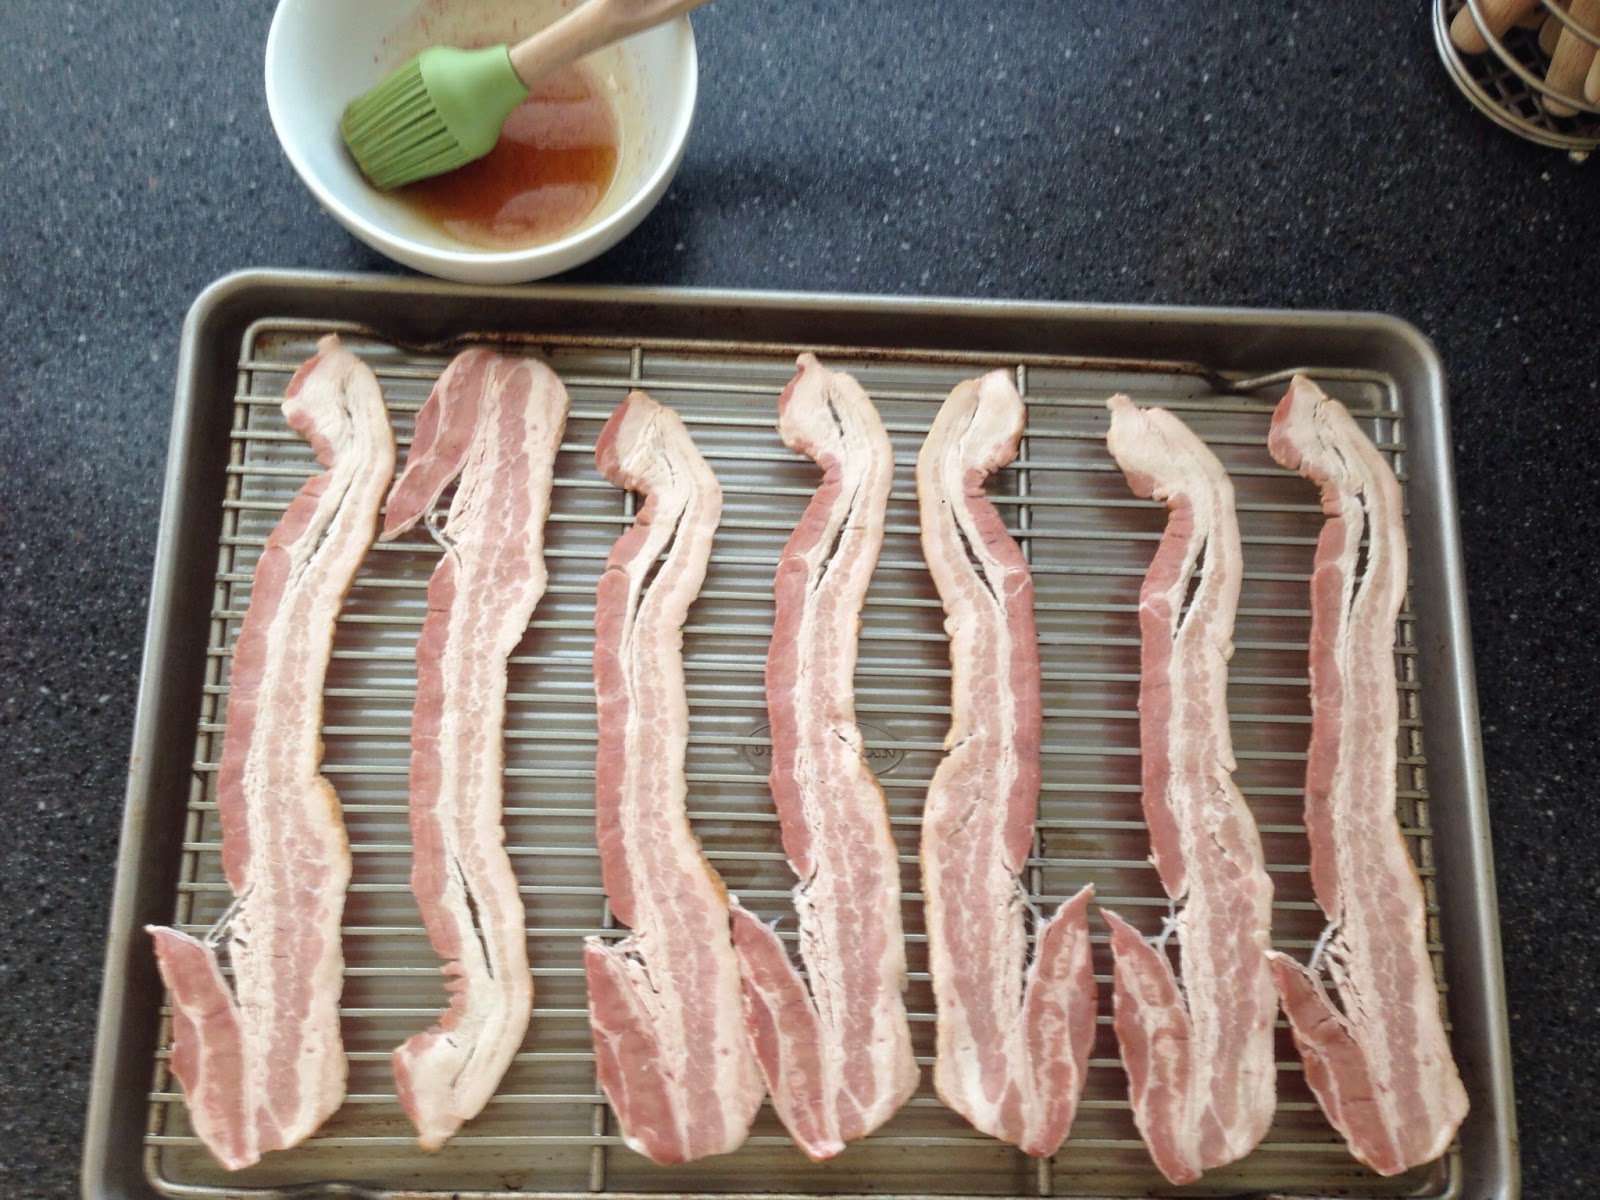
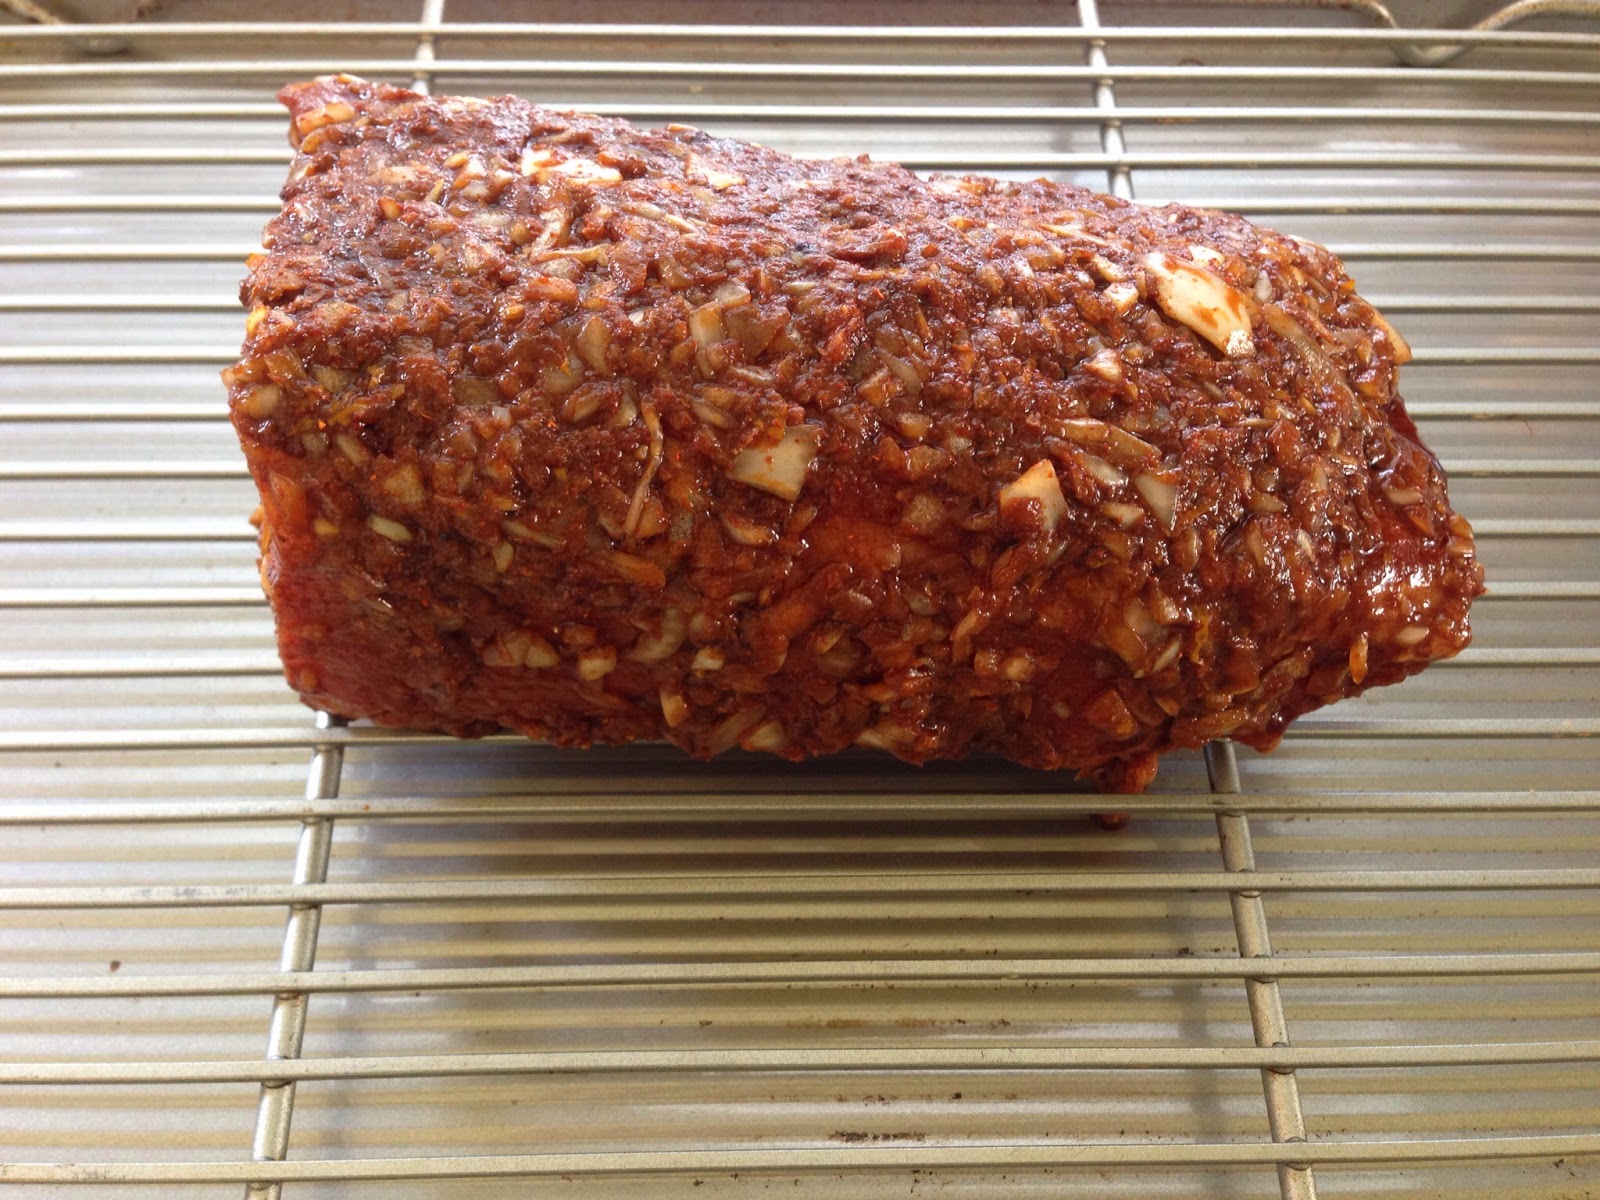
See the pretty cayenne speckles? My mouth is watering... too many years without bacon.

Other Bacon Flavor Options?

- Sriracha or Frank's Red Hot
- Cajun Seasoning
- Apple Chutney
- Cinnamon and Syrup
- Garlic Powder
- Almost any jelly or preserve


Friday, June 27, 2014

Chicken Tikka Masala

After college and before starting my career, I taught High School in Tajung Malim, Malaysia. To get used to such a different culture I stayed with an Indian family my first few weeks there. This was one of the first dishes they prepared for me and I remember it distinctly because at the time I didn't eat meat. I felt really bad not wanting to eat it and did not want to be ungrateful in a town where the average monthly income was less than most of us make in a day. My "family" wasn't poor per se, but for the normally vegetarian family to buy chicken was a big expense in my honor. I ate the tomatoes and the rice, but now looking back REALLY wish I had tried their version cooked in the traditional tandoor oven (basically a clay pot.) Below is a picture of me with some of my students.


Tikka Masala, in general, involves a spicy, tomato based sauce, cream, some type of protein marinated in yogurt, and spices like cinnamon and cumin. It is also really easy to freeze. If you are in the midst of a food prep, or feeding just you, freeze half or double the recipe while you have the ingredients out and freeze half. If you can find boxed tomatoes use them, saves you some can opening and they are tasty! They are usually 26.5 oz and found next to the canned tomatoes... replace the tomatoes and paste in this recipe if you find them.
I know rice isn't Paleo but I ate this over rice.  I needed to stretch a buck and I also have been running a lot more on top of going to the box so I wanted some extra, gluten-free carbs in my diet. I also used a skillet instead of my dutch oven... not sure why?! So use your dutch oven. :)

Chicken Tikka Masala

(Printable Version)

- 1.5 lbs Chicken (thighs or breast), cut into 1" cubes
- 2 Tbsp Oil or fat
- 3 tsp Salt
- 1/4 tsp Black Pepper
- 1 tsp Cumin
- 1/2 Small Onion, finely chopped
- 2 Garlic Cloves, minced
- 1 Tbsp Fresh Ginger, minced
- 1 Serrano Chili, minced (this is a long, green chili, if you can't find it pick another chili that's comparable, like a jalapeƱo) ** Take out the seeds and membrane if you are sensitive to heat
- 1 1/2 tsp Garam Masala (Usually cumin, coriander, cardamon, pepper, cloves, nutmeg)
- 1 tsp Cinnamon (optional)
- 1/2 Cup Low-Sodium, or unsalted Chicken Stock
- 1/4 Cup Coconut Milk, full fat
- 1 (28 oz) Can Crushed Tomatoes
- 2 Tbsp Tomato Paste
- Fresh Cilantro (optional)

1. Sprinkle the Chicken with 1 tsp of Salt, the pepper, and cumin. In a dutch oven or skillet over medium-high heat, heat a tablespoon of oil of your choice and saute the chicken until browned, remove from pan.
I always remove my chicken and put it in the container I will be storing the food in later, saves on dishes!


2. Add the other tablespoon of oil and add the onion, garlic, ginger, and chili. Cook until softened, about 5 minutes. 

3. Add the Garam Masala and cinnamon and cook 1 more minute before adding the stock, milk, and tomatoes. Scrape the bottom of the pan to dislodge any "bits" and bring to a boil for about 2 minutes stirring frequently. Reduce the heat to a simmer and add the chicken back in. Cook another 10 minutes. Serve over cauliflower rice, brown rice, or eat it plain... enjoy!


Thursday, June 26, 2014

Grain-Free Strawberry Shortcake

It is strawberry season in Michigan!! This time of year brings back a lot of memories for me with my beloved Grandma Guernsey and my mom taking us strawberry picking and then home to make strawberry freezer jam. There is a crazy amount of sugar in the jam, but it is so good! I will be making some of the original and some of my chia seed jam ... the real stuff is too good to pass up and it's ok to have a tablespoon or five every once in a while. Since my mom is in Hawaii with my dad, Mara and I took Charlotte on our own this year for her first time picking strawberries. Since she is only two she enjoyed picking everything that looked like a berry... rotten, dirty, on the ground, white, you name it... she also wasn't too picky on which ones she ate, so we have to intervene a few times to help her find the red ones on the plant, not the ground.


Driving home the car smelled so good... almost 20 pounds of fresh strawberries is heavenly. We didn't get many big ones, and also didn't get as many as we wanted, for two reasons....1. We went to a natural farm and without the use of chemicals and products to make them massive they were all "regular" sized or little and 2. Charlotte was hard to keep an eye on, especially when the school-kid tour groups arrived. But it was a great morning and a tradition I a excited to pass along to her. 


This recipe uses coconut flour. If you want to use almond flour you will use a little more because coconut flour is a little more absorbent. Start with a 1/2 cup of almond flour, mix in the rest of the ingredients, and then add a little more at a time to get the right consistency. These flours take a second to thicken so be patient, you don't want the biscuits to turn out too dry. The biscuits can be made less sweet, they already aren't super sweet, but you can add chives or jalapenos and use them in chili, pour sausage and gravy over them for breakfast, or even use them as buns for a breakfast sandwich. 

Grain-Free Strawberry Shortcake


- 1/2 Cup Coconut Flour*** see note in recipe
- 4 eggs
- 1 tsp Vanilla
- 3 Tbsp Raw Honey
- 5 Tbsp Coconut Oil, softened or melted
- 11/2 tsp Baking Powder
- Pinch of Salt
- Dash of Cinnamon or Nutmeg (optional)
- 2 Cups Fresh Strawberries, hulled and quartered
- 1 Tbsp Coconut Sugar (or honey)
- 1 Tbsp Lemon Juice

Preheat oven to 375 degrees
1. Mix coconut flour through cinnamon (if using) in a bowl until well combined. Don't over-mix... some lumps are ok. 

*** NOTE: The batter should be able to be "mounded" onto a cookie sheet without running into the mound next to it. If it is too runny add more flour a tablespoon at a time and mix... the most I used total was 2/3 cup flour. This depends the brand of coconut flour, not sure why. Give it some time in between mixing and adding more because the batter tends to thicken over time.


--- if you are letting the batter "rest" now would be a good time to combine the strawberries, coconut sugar, and lemon juice in a bowl. Let them sit out or in a fridge and the juices of the strawberries will start to come out and make a tasty syrup... this is called maceration and has everything to do with osmosis :)

2. Using about 2-3 Tablespoons of batter, make mounds on a cookie sheet. No need to flatten them. This recipe will make about 10 biscuits. 

3. Bake for 10-12 minutes until the top has started to brown and the middle of each biscuit is firm. Remove from the pan immediately so the bottoms don't burn and cool on a wire rack. 


4. Slice the biscuits in half and top with the strawberries before putting the top back on... or just use two biscuits since they are not very thick. ** If they turn out really flat you might not have added enough flour, or had the oven hot enough. But even if they are flat, don't throw them out.... they are still tasty! Just use two :) 


Making Baby Food

I have been asked by a few different people how I made baby food, how I stored it, etc. so I figured it was time to put it in the blog. I don't have a lot of pictures because at the time I didn't think I would have a blog, nor was I thinking about taking pictures when I was trying to make food with a baby to take care of at the same time.

Tips and Suggestions

- Baby food doesn't have to be gross. It should taste good to you too because after all it should be just pureed food that you would eat. You can easily do chicken and rice and veggies and pureed with stock if that's what you are doing for dinner. I used to make a bunch at a time, freeze it, and add different combinations of cubes for one meal or just make sure she was balanced throughout the day.
- It is very American to start with that gross mushy cereal... start with an avocado pureed with milk (breast or formula if that's what they are still drinking) until thin. Way more nutritious than what comes in a box.
- Add vegetables in any way you can... seriously... spinach with any fruit and you can't taste the spinach... try it with apples and cinnamon :)
- Don't buy special equipment... see below on what you need
- Don't give up, keep trying different combinations and see what your baby likes, try foods a few times because these are new textures for baby.
- Making your own food is SOOOOO much cheaper... but in a pinch or if you are out and about don't feel guilty about the high-quality store bought ones... there are some in the pouches that are awesome.

What do you need?

- A blender... yours in fine... please don't invest in a "beba" or "baby bullet" so unnecessary unless you have no blender at all
- A steamer basket, or collapsable steamer
- Ice Cube Trays


Storage:

You can buy fancy storage containers, bags, and various other products to store baby food. I found that the cheapest, easiest way was to put the food in (clean) ice cube trays, wait until they were frozen, then pop out the food cubes and store them in labeled freezer bags in the freezer. To thaw I would microwave slowly, stirring frequently... ALWAYS taste before giving to baby in case there are hot spots. I know you are "supposed" to heat things gradually in warm water or whatever but honestly I didn't have time for that and found that 30-60 seconds stirring a lot was fine. Each cube is about 1oz in you need to know the amount your baby is eating... she would eat 2-3 cubes per meal which is about what a jar of baby food is.

Sweet Potato Puree

One sweet potato makes so much food! It saves so much money to make this meal. This can be done with a lot of different vegetables... I have made steamed carrots, squash, apples, pears, etc. this same way. With fruit, use less water or none at all.

- 1-2 Sweet Potatoes (depending on size and how much you want), peeled and cut into 1" cubes

1. Bring a pot of water to a boil in a pot with a steamer insert, or collapsable basket. Make sure the water isn't infiltrating the basket when it is in the pot. 
2. Reduce heat to a simmer and put the potatoes in the steamer basket. Cover and cook 10-15 minutes, until potatoes are tender enough that if you pierce them with a fork they penetrate easily. 
3. Carefully transfer potatoes and 1 cup of the water from the pot to a blender and puree until smooth. Add more water from the pot gradually until you get the right consistency. Careful blending hot ingredients! They will expand so hold the lid. 
4. Store in ice cube trays.... up to 3 months in the freezer and 5 days in the fridge.

Pear and Spinach Puree

A sneaky way to add veggies... so tasty!

- 2 Pears, peeled and diced
- 1-2 Cups, baby spinach

1. Cook the pears the same way as the sweet potatoes above. Transfer to a blender and add the spinach... don't add water! Puree until smooth.
2. Store in ice cube trays.... up to 3 months in the freezer and 5 days in the fridge.

No-cook Banana, Pineapple, Avocado, Spinach Puree

- 1 Banana
- 1/2 Pineapple
- 1 Avocado
- 1 cup Baby Spinach
- Water/Milk

1. Combine all ingredients in a blender adding water/milk as needed for consistency. 
2. Store in ice cube trays.... up to 3 months in the freezer and 5 days in the fridge.

Tuesday, June 24, 2014

Eye-of-Round Roast... perfect for sandwiches!

Charlie and I went to the zoo today.... we live really close and usually go once a week. This year is so different than last year because she can walk more and knows the animals. Although going to the zoo meant no workout today I am attempting not to be jealous of my friends at the gym because we had a great morning together. We also got to eat these fantastic sandwiches for lunch... after smelling it cook all day yesterday I was excited to try it!


I am experimenting with different kinds of meat. Mainly just to mix things up and try out what works with what. Eye-of-Round is generally a little cheaper than a lot of steaks. This is probably because it is a tougher, really lean cut of meat probably due to where it comes from... hindquarters of the cow, lots of use back there when the cow exercising! Most of the time I have heard of people using it to make jerky but I also know that cooked under a really high temperature and then a little longer at a lower temperature creates a tender, tasty steak. I have read recipes where you literally cook it at a high temperature and then shut off the over and leave it for hours... that sounds awesome but I don't have that kind of time so I improvised. Cooking it this way leaves a crusty, delicious outside and a pink and tender inside... cut thinly it is so good on a sandwich. I ate mine on gluten-free bread with Annie's Organic horseradish mayo.


Eye-of-Round Roast 

(coffee rub)

(Printable Version)

- 2lbs Eye-of-Round Roast, fat trimmed off
- 1/2 Small Onion, grated 
- 2 Tbsp Instant Coffee
- 2 Tbsp Chili Powder
- 2 tsp Salt
- 1/4 tsp Black Pepper
- 1 tsp Paprika
- 3 Garlic Cloves, grated

Preheat oven to 500 degrees. 

1. Combine the onion, spices and garlic in a bowl, massage onto the meat and let it sit for 20-30 minutes so it can reach room temperature and marinate a bit. 
2. Place the roast in a roasting pan or dutch oven (or a rack over a cookie sheet like I did) and put it in the oven for 10 minutes, turn, and cook another 10 minutes.


3. Without taking the roast out, turn the over down to 300 degrees and cook 30 more minutes. No turning needed. 
4. Take the roast out and let it rest. If you are making sandwiches let it cool completely, wrap it in plastic wrap and tin foil and put it in the fridge for a few hours or over night... flavor is amazing. Cut the roast to your taste... thinner is better though :)


Sunday, June 22, 2014

Cranberry-Almond-Coconut Granola

So this week is an off week working out... I hate that...boo. Working out is my time to do something I like and it makes me feel good about life in general. When it doesn't go well, weights feel heavy, failures happen it is just a major bummer. The only highlight this week was not dying during Tuesday's workout (running, ring dips on the high rings- aka including a muscle up, dead lifts, rope climbs in 90 degrees) and Friday night when I got to do "Heavy Grace" with Kelly. Her power cleans are so ridiculously better than mine... I have the bruise on my chest to prove that slow elbows are my thing... but we did a weight that is heavy for both of us and I have never clean and jerked it that many times. Go us!


Friday night was good for another reason... I ate a steak for the first time in over 10 years! From being vegetarian and then vegan I just haven't had a steak. I know I have eaten steak cut up on a skewer and in my beef and broccoli... but this was the first time actually eating a literal hunk of meat on a plate... a filet. I went on my first official date with Rudy to the Clawson Steakhouse which is fantastic because it hasn't changed inside or out since probably the 80s. We got a table right by the dance floor and the band was made of men all in their 70s playing Frank Sinatra and all of the other "crooner" classics. We danced, ate steak, and watched the older people of the restaurant still so in love twirl their sweethearts around the floor. Perfect way to end my week.


Granola is my new breakfast (although it would have killed my date from last night- nut allergy). It's getting hotter, I am getting sick of eggs... time for a change. I don't love it plain, but I love it with the thick sweet, taste of raw milk. My friend Carrie suggested this combination and I thought I would give it a try. Carrie's baby is going to be on the 2030 Regional team with my little one... hers comes to competitions, was at Regionals.... we are both starting them early and I can't say that I'm not thrilled that my daughter is seeing so many strong women, working, lifting weights, and having babies. :) Another friend I workout with found the green mason jars I have been looking for... score! My collection is complete. I decorate, store food, and drink from them... below is a picture of my built in shelves where I keep some of them when not in use.


Cranberry- Almond- Coconut Granola

- 3 Cups Sliced Almonds (try to find them in bulk... cheaper!)
- 1 Cup Unsweetened Shredded Coconut
- 1 Cup Unsweetened Cranberries (if you can't find unsweetened, read the ingredients at least)
- 2 Tbsp Almond Butter
- 1 tsp Vanilla
- 1/2 tsp Salt
- 1/3 Cup Grade A Maple Syrup

Preheat the oven to 350 degrees.

1. Mix all the ingredients in a bowl until well combined.


2. Spread in a thin layer onto a cookie sheet lined with parchment paper.


3. Bake for 15-20 minutes. Stirring at the 10 minute mark. REALLY watch it after 15 minutes... it can go from perfect to burned quickly so stir often. It will be softer until it cools. Remove from the oven and cool completely before storing in air tight containers... or my favorite... mason jars.


Nutrition Facts
Servings 6.0
Amount Per Serving
calories 456
% Daily Value *
Total Fat 36 g55 %
Saturated Fat 10 g50 %
Monounsaturated Fat 17 g
Polyunsaturated Fat 7 g
Trans Fat 0 g
Cholesterol 0 mg0 %
Sodium 203 mg8 %
Potassium 414 mg12 %
Total Carbohydrate 29 g10 %
Dietary Fiber 9 g36 %
Sugars 16 g
Protein 12 g24 %
Vitamin A0 %
Vitamin C4 %
Calcium18 %
Iron13 %
* The Percent Daily Values are based on a 2,000 calorie diet, so your values may change depending on your calorie needs. The values here may not be 100% accurate because the recipes have not been professionally evaluated nor have they been evaluated by the U.S. FDA.

Friday, June 20, 2014

Baked Sweet Potato and Sausage Brunch

I am trying to mix up my breakfast routine. I am getting bored. I still have a lot of the same ingredients I use for my breakfast hash though so I thought I would try cooking them a different way because I am not one to waste food. This is a little spicy with the chicken sausage I used, which is why I call it "brunch." If you use breakfast sausage or regular chicken sausage or are weird like me and put hot sauce on everything then by all means eat it at 5am.

Baked Sweet Potato and Sausage Brunch

- 5-6 Chicken Sausage links, halved and sliced (read labels! Lots of added "junk" in these sometimes) I used spicy chicken sausage
- 2 Large Sweet Potatoes, peeled and diced (~1/2" cubes)
- 2 Tbsp Oil, or any other kind of fat
- 1 tsp Salt
- 1/2 tsp Pepper
- 1/2 tsp Garlic Powder
- 1/2 tsp Cayenne Pepper
- 1/2 tsp Paprika
- 8 eggs
- 2 cups Baby Spinach

Preheat the oven to 500 degrees (yep, hot)

1. Place the sweet potatoes, sausage, oil and spices in a 9"x11" baking dish that has been lightly oiled. Toss to coat.


2. Bake 30-45 min until potatoes are soft and starting to crisp. Stir half way to prevent burning.
3. Reduce heat to 400 degrees. Top the sweet potatoes and sausage with spinach and make "wells" for the eggs. If you don't like a runny yolk scramble the eggs before putting them in the dish. 


4. Crack one egg into each well and put the dish back into the oven for 10-15 minutes... whites will cook but the yolk will remain runny. If you are scrambling eggs cook for about the same amount of time, or until you wiggle the dish and the eggs are firm. 


Wednesday, June 18, 2014

The Purple Smoothie

I think I may finally be an adult again. I have a car, a house, a job, and a baby and they are all mine. I have been borrowing one of my parents' cars since the divorce while I was trying to get on my feet and a few days ago while I was driving the tire..excuse me... wheel ....literally broke off... I am not talking like the rubber tire, I mean literally the whole wheel bent under the car and the car fell onto its frame. I am sooooo incredibly thankful that Charlie was not in the car and I was not on the highway. Broken ball joints and axles... ugh. Since my parents are out of town I called the man I was supposed to be going on a date with that night to see if he would rescue me instead (Thanks Rudy!) Damsel in distress is usually not my thing but I had no choice. :) So to make things worse when I went to go pick the car the other car I borrowed wouldn't start because the battery was dead because I accidentally left the lights on... I seriously give up. I am now afraid to drive and went the very next day to get my own car. I am on a pretty tight budget, but ended up getting a Honda CRV... it is a small SUV within my price range so I am happy. What does one do when they get a car of their own? They mark it with their box.


It seems every time I go onto social media or watch the news people are talking about "juice diets" and "detoxing" and things of that nature. Now I am all about doing what you think is best for you, but instead of cramming your body full of sugar, liquids, and sitting on the toilet for a few days wouldn't it just be better for you to not put nasty shit in your body in the first place? I know we all have our days (weeks, months) but to get back on track I would just try to be strict with what I eat again...but that's me and you're you so whatever. :) I suppose this smoothie could be called a "detox" smoothie because it contains healthy fats, veggies, and fruit, but I am just going to call it a purple smoothie because that's what color it is... well kind of mauve but you get the idea. I gave Charlie some too because she is all about the smoothie.


PS- my new favorite non-alcholic drink is Berry La Croix and POM juice.

The Purple Smoothie 

- 1 Banana, frozen preferably (anytime a banana ripens beyond normal eating I throw it in the freezer)
- 1-2 Cups Baby Spinach (large handful)
- 1/2 Avocado
- 1/2 Cup Raw Milk (or any milk or water)
- 1/4 Cup Blueberries (about a handful)
- 1 lime, zest and juice

1. Put all ingredients in a high powered blender and blend until smooth, scraping sides as needed. It helps if you cut the banana into large pieces. Taste... add more juice once it is blended if you try it and think it needs more. The lime gives it such a better flavor.


Tuesday, June 17, 2014

Lettuce-Free Chopped Salad

After the winter we had I will not complain about the heat we are now having. I am just happy I have air conditioning in this house since through college and my previous house did not. I am cheap and have it set at 77 degrees but still. :)
This past weekend I competed in an event for Heroes: Supporting American Snipers. This is a picture of my team: Steve and KK and one of my sister and me... we rarely do the same competitions so it was great to be in the same event. We are partners for the battle of the sexes coming up so watch out!


 It was a fun day and I finally did muscle ups in a competition. I have been able to do them for a while but for various reasons haven't done one in a competition or the CrossFit Open. I even strung 2 and 3 together a few times. I realize for some people it isn't a big deal, but it's a proud moment for me since I have been wanting to do them since I started CrossFit and saw people up there on the rings.


This is a salad I have been making for years... a lot during college actually. My roommate Alicia used to do something similar so I took the idea form her. Lettuce in college was another expense and often it would go bad and get wilty before I could use it all... solution? Make a salad with no lettuce. You can add whatever you want, but this is my original version. I would think grilled chicken would make this fantastic... maybe tomorrow. Super refreshing and light after a really hot workout involving multiple rounds of running, deadlifts, rope climbs, and muscle-ups+ring dips after which I did not stop sweating for probably a month... or at least a few hours even after a shower.

Lettuce-Free Chopped Salad

- 1/3 Large English Cucumber, peeled, quartered and chopped
- 1 Roma or Vine-Tomato, seeded and chopped
- 1 small or 1/2 large Carrot, peeled and chopped
- Red Onion, as much as you want... I use just a few "rings" chopped
- 1/4 cup (or less) Chopped Pecans
- Handful of Unsweetened dried cranberries (I like to be exact when measuring :)
- Salt and Pepper
- 1 1/2 Tbsp Olive Oil
- 1 Tbsp Red Wine Vinegar (or apple cider)
- 3 Tbsp Feta (optional)
- Handful of gluten-free croutons or pita chips (optional)

1. Mix everything together and enjoy. :)


Sunday, June 15, 2014

Blackened Salmon

It's that time of the year!!! Costco is carrying wild caught salmon... woohoo! I usually pay upwards of $19.99/lb at Whole Foods and it is only $12.99/lb at the Costco near my house.... $14.99/lb at the one near my parents... ha! Stock up people, it doesn't last long.
My child actually has eaten fish since she started eating real food. I give her what I eat and if she decides she doesn't like it that night than she can eat her veggies and fruit or nothing. I know it kind of sounds mean but I don't want her being a picky eater and liking something one day and not liking it the next is just mind-blowingly frustrating. I am also not going to cook two different meals for us and she always has the option of peanut butter and jelly, which I think she would love to take any day of the week anyway.
I know that blackened salmon is traditionally done in a skillet, but I just took my blackened salmon spice mix and put it on top of my salmon on a plank because I wanted to grill. It is way too nice of a day to be standing over a stove cooking. If you are going to do this in a skillet, start with from ghee or clarified butter in a pan and put the salmon skin side down to make it crispy. Flip it and cook until blackened... 3-5 minutes on each side over medium-medium high heat. On a grill, soak the plank (I got mine at Williams Sonoma) for at least an hour. Place the seasoned salmon skin side down on the plank then on the grill. Close the lid- cook 15-20 minutes until firm... but not TOO firm... when you press on it. I am eating mine over a left over caesar salad. :)


Blackened Salmon Seasoning 

- 1-1.5 lb Wild Caught Salmon
- 2 tsp Paprika
- 1/2-3/4 tsp Cayenne Pepper (depending on how spicy you want it)
- 1 tsp Salt
- 1/2 Garlic Powder
- 1/4 tsp Black Pepper
- 1 lemon

1. Mix the spices in a bowl. Squeeze the lemon over the salmon and sprinkle with the spices. Cook your preferred way... directions for grilling vs. skillet are in the last paragraph above. 


Friday, June 13, 2014

Bleu Cheese Burgers

School is out for summer! Yay! It never really hits me until Monday morning when I don't have to get up... well not before 5am anyway. I am ready to be at home with my little girl. I know, I get it, teachers have it easy, we only work until 3pm (hahahaha!), we get summers off, etc. My response to that is always "you could have been a teacher." To which I get things like "they don't make enough" "I could never work with kids""Ugh, no"... ok then don't have your summers off and don't complain to me. :)


Tonight while I was grilling Charlie and Henry (my sister's dog) went for a swim... ahhh summer!


Still on my grilling kick, I took inspiration from a WildTree party my sister, mom, and pretty much all the women I work out with went to except me. They made bleu cheese burgers so I decided I could make something similar on my own. You could easily use a different cheese, but I think the bleu cheese holds up well to grilling and the cheese on the outside has a different texture than the cheese on the inside so good! I ate mine on top of lettuce from my garden pots... I have quite the harvest for my first time cutting the lettuce.

 Bleu Cheese Burgers


- 1 lb Grass-fed Ground Beef
- 1/4 Cup Bleu Cheese- read the label- look for milk that isn't pasteurized- it shouldn't be 
- 1 tsp Fish Sauce 
- 1/2 tsp Pepper
- 1 Tbsp Oil

1. Mix everything together until well combined. Don't overmix- it will toughen the meat. Form four patties, flatten and indent the middle so it creates a flat burger when cooked.
2. Preheat the grill and cook 5-10 minutes (ish) on each side depending on how you like your burgers cooked and how hot your grill is. 
3. For the zucchini, I just cut it in half, tossed it in oil, salt and pepper and cooked it on the grill for a few minutes on each side.