Saturday, February 28, 2015

Pre-workout Open Cookies... The Open 15.1

I am calling these "Open Cookies" because the open at our box is an awesome event, but that sometimes means waiting for your turn to compete so you need something you can snack on. So many people come to hang out and watch and compete from 4pm Friday until 8-9pm that night and then it begins again Saturday morning and Sunday Morning. Even if you aren't going to be the best, or score well, almost everyone signs up anyway and everyone cheers for everyone else like they are going to the games... it's incredible and exactly why I love the sport. This is me during my first attempt at 15.1. I scored 164 on the first part and clean and jerked 140lbs. I am not disappointed with my score, but as soon as I finished I knew I could do better so I am attempting it again on Sunday. It's not a workout that really taxed me so I feel good to go again!! 


Since so many people go, I have come in at 4pm before and not gone until 6pm... I eat lunch at 10:45am so this becomes a problem. One of my favorite things to eat while competing is peanut butter (with a spoon)... and since other people like bananas during a competition I thought why not combine them? They are something you can snack on before you go or driving to the box since the flavor is mild and the ingredients are nothing hard on the stomach. The "dough" is fairly sticky depending on what kind of nutbutter you use so I might try adding a bit of protein powder next time to mine because sunbutter is "wetter" than say almond butter. I know they are not the prettiest, but neither am I when I am lifting! 


Pre-workout Open Cookies

(Printable Version)

- 1/2 Cup Nutbutter (or Sunbutter)... Almond, etc. If you use peanut butter use half that and half a nutbutter
- 1 Ripe Banana, mashed
- 1/2 tsp Cinnamon
- pinch of salt

Preheat Oven to 350 degrees. 
1. Mash the banana. Add the remaining ingredients and mix until combined. 


2. On a greased or parchment lined cookie sheet, drop and flatten about 1 Tbsp of the batter. I made 9 cookies with one batch. Bake 12-15 minutes until firm on top... watch that the bottoms don't burn! Cool before eating or else they don't have that chewy-ness yet! :)


Sunday, February 22, 2015

"Peanut Butter" Chocolate Squares

Here's what I don't get... people who complain about their circumstance, but do nothing to change it. If you don't make steps to move forward than you have lost the right to complain. Holding onto to the past or bitterness is only hurtful to you- sometimes you just have to let it go and move on and hope for the best. It has now been a year since my divorce and although the day it was finalized will probably be a day I always remember I have to say it feels like forever ago. People told me the grass isn't always greener on the other side and I knew my decision was not going to be the easiest route, but looking back I am in a much better place mentally than I was a year or even two years ago. I am not going to lie and say it is not hard some days, but hard is different than unhappiness that doesn't end with a new day. We all have fears, we all will mess up and all make bad choices, but we all also have the ability (usually) to have another chance. It's up to you to have the life you want. Alright- done with my preachy thoughts on this Sunday... and to end here is a picture of my little love going grocery shopping with me- learning her vegetables and that food should come like this- not in a box or distorted- it's so important to learn things like this young! :)


So I was playing around with protein powder again since it is my favorite ingredient to bake with these days and I wanted something treat-like to share with my box people. Ironically these turned out to be no-bake but whatever! They were a hit with those that tried them. I made them small and thin on purpose because they are rich to me, but if you want them thicker, double the recipe!


"Peanut Butter" Chocolate Squares

(Printable Version)

- 1/4 Cup Coconut Oil, melted
- 1/3 Cup Chocolate Protein Powder
- 1/4 Cup + 1 Tbsp (divided) Nut or Sunbutter
- 2/3 Cup Mega-Chunk Enjoy- Life Chocolate (dairy free)
- Sea Salt (Optional)

1. Combine the oil, protein powder, and 1/4 cup of sunbutter until smooth. Spread into a parchment lined 8x8 pan. Put it in the freezer while you melt the chocolate.


2. Combine the chocolate and 1 Tbsp of sunbutter in a microwave safe dish. Microwave for 1 minute, stir, and microwave again in 30 second intervals until melted and smooth. Stirring often. 

3. Pour over the sunbutter mixture and sprinkle with sea salt. Place it back in the freezer for 20 min or the fridge for at least an hour before cutting into 16 equal squares. 

Thursday, February 19, 2015

Mason Jar Eggs

It's here!! The CrossFit Open starts next week!! Although I am not feeling as ready as I would like... I wish I were going into this a bit stronger, it is always fun to see how far you have come. I was thinking back to my first open two years ago when I had 7 minutes left in the workout to do a 75# snatch- I couldn't. I literally tried for 7 minutes and couldn't. Although that is still not one of my strongest lifts, just the other day I did 30 snatches at 95# as part of a workout. When I am feeling blah and unmotivated I try to remember how far I have come and where I want to be. That being said I want to do my best this year and I think I am going to try to be as undistracted as possible the next few weeks. To be honest I don't go out a lot anyway, a far cry from my former self, and if I am out on a Saturday night I will be thinking about having to go to bed because I plan on doing the workouts for the second time on Sundays... I am just not in the mood....I'm giving it hell this year. :) Woohoo!! Please let me do a muscle-up in this year's open... last year I could do them but didn't make it there in the workout... grrrr!! 


This is me when I first started CrossFit, the middle is after I had been doing CrossFit a few months, and the last picture is when I changed my diet from vegetarian to Paleo... just like my lifts it's important to look back on where I have come from and keep in mind feeding my body what it needs is equally as important as the exercise... I ironically struggle with this- I tend to take my workouts seriously but don't always take my eating seriously and make sure I am eating enough.... probably not going to see my lifts go up until that part is fixed! So that's where this meal idea came from. That and my friend Kelly saying she microwaves eggs at work with my breakfast hash! Brilliant! 


Breakfast on the go- sometimes it has to happen and since eating enough is sometimes a problem I have, especially when busy, I need to have ways to get some protein in even when I rush out of the house. I head to work really early and sometimes I don't want to eat as soon as I wake up- since all I have at work is a microwave this is ideal-- I can throw everything in the jar, put a lid on it and cook it when I get there--- without the lid!!! It's metal. I always chop and cook a pound of bacon as part of my weekend meal prep. I use it wh
en I cook eggs in to the morning at home, throw it on a salad, etc. and it is perfect for this. I am definiely using vegetables like broccoli or spinach next time too. 

Mason Jar Eggs

(Printable Version)

-  two eggs
 - cooked bacon, finely chopped
- salt and pepper
- Vegetables, finely chopped

1. In a mason jar- use one bigger than a jelly jar- put in all of the ingredients, close the lid. 


2. When you get to work, or after the gym, shake everything. 


3. Remove the lid and microwave 1-2 minutes. It'll puff up while cooking so stir at the 30 second mark. I topped mine with hot sauce and avocado.


Tuesday, February 17, 2015

What are these products in my recipe? Can I substitute?

Not a lot of personal stories to share at the moment... but oh boy is potty-training fun! I am also thinking I should join a dating website...my previous/current relationship is confusing and maybe I need to just move on...I don't go out a lot, no one I work with intrigues me, etc... isn't that the way people meet these days? Then I can lay it out there: I have a toddler, I work full time, I work out A LOT and I like it, I cook a lot and eat healthy, I own my own house and am financially independent, and don't want to be your mom.... do you still want to date me? :) Hehehehe anyway... 

I have been getting a lot of questions from friends lately about why certain ingredients are used and what they are used for so I thought I would do a post explaining them.... this way you can decide how "paleo" you want to make something or if the (usually cheaper/more convenient) option is fine by you. This might also help you make any recipe you see a little more paleo or gluten free for your family. If I am missing one you have a question about let me know and I will add it to the list! 


Arrowroot Powder- 


What is it? 
Arrowroot powder comes from the South American plant, Maranta arundinacea. It has the name because it was used to treat wounds from poison arrows. You can buy a bag for less than $5 in most normal grocery stores- it is found by all the specialty flours. 
Uses in Cooking:
I use arrowroot powder as a thickening agent in place of corn starch. I have found that arrowroot has a direct correlation measurement-wise to cornstarch in most recipes. You can mix it with water to make a slurry for thickening sauces, or coat meat in it before frying to get a crispy coating (See take-out chicken).


Coconut Aminos


What is it? 
Coconut aminos is made from raw coconut tree sap and sun-dried sea salt. It contains 17 amino acids (the building blocks of protein) and is a dark, salty liquid.
Uses in Cooking:
This is a gluten-free alternative to soy sauce. It can be used as direct replacement for soy sauce in almost all recipes. 


Tapioca Starch


What is it? 
Tapioca flour is made from the starch extracted from the South American cassava plant.
Uses in Cooking:
Tapioca flour is often used  in baking- it makes baked goods chewy/crispy. You will find it in pancake recipes, pizza crust, muffins, etc. usually in combination with other gluten-free flours. 


Potato Starch vs. Potato Flour


What is it?
Potato flour is made from whole potatoes that are dried and ground into flour.
Potato Starch is a very fine white powder starch, similar in texture to cornstarch, made from the dried starch component of peeled potatoes. It has no potato flavor so works well in most recipes, sweet or savory.
Uses in Cooking:
Potato Flour has a distinct potato flavor-  you will see it in small amounts in a lot of bread or pizza dough recipes- it absorbs liquid like crazy so be careful!
Potato Starch thickens foods and can be used to make light and fluffy baked goods... I use it in my pizza recipe

Fish Sauce

What is it? 
Fish sauce is a liquid made from the fermentation of fish (usually raw) with salt. 
Uses in Cooking:
Fish sauce is used in sauces to add a salty element similar to soy sauce. If you are following a paleo diet you will often see this in combination with coconut aminos to create that soy sauce flavor. It cannot be used in the same amount as soy sauce because it has a different (fishy), more potent flavor. If you do not have any and are not paleo, you can add a bit more soy sauce to the recipe. 

Baking Powder vs. Baking Soda

How to Make Baking Powder
Neither are technically paleo... but used in such a small amount most people don't care. They are both leavening agents and help food rise. 
Baking Soda- Baking soda is a base (think back to chemistry class!) and often that recipe will have an acidic element as well, such as vinegar, lemon juice, buttermilk, or yogurt. When the two come into contact, bubbles of carbon dioxide are formed, creating the leavening in your dough or batter.
Baking Powder- is a mixture of baking soda and usually cream of tartar, and perhaps some corn starch to help keep the two separate and dry. Baking powder usually reacts twice- once when added to a liquid and again when heated. You can make your own baking powder by mixing one part baking soda to two parts cream of tarter.
Substitutions:You can substitute baking soda for baking powder... 1/3 the amount of baking soda as it is stronger, and a teaspoon of acid (vinegar or lemon juice) for every 1/2 teaspoon of baking soda.


Friday, February 13, 2015

Frozen Pizzas and Meal Prep

Meal prep is key if you want to stay on any diet. I spend almost all day one of the days of the weekend cooking and prepping. If I don't have food to eat I either don't eat much (not good), or I eat food that's not good for me... also not good. This is a picture of what my kitchen table looks like when I am prepping.


I get that not everyone has a day to cook- believe me I do- so here is what I do when I don't have that kind of time. I pick two to three things to make each week and try to make sure they have similar ingredients so I am just cooking a lot of chicken or whatever. I also do one crockpot meal because they take little effort with lots of food as a result. If I am ever making a soup or chili I make more and freeze some of it so it is there if I need it.


 I also buy rotisserie chickens A LOT. Costco has them for $5.99 and that's a great deal when you see how much meat you get. It also just saves a lot of time cooking the chicken. I use them for meat on a salad, as the chicken in my Chicken Pad Thai, chicken salads (Buffalo Chicken Salad and Regular), etc. I then portion them into meals I can just grab and heat up... I bought the containers (in the pictures) at Costco and they are microwave and dishwasher safe. I know some of you are still thinking there's no way... eating this way takes time and prepping... sorry! I do cook for people so hopefully in the future you can find someone like me or buy from me and then you are all set in weeks that you find yourself in a pinch.


My recent make-ahead meal is pizza. Frozen pizzas are such a go-to for a lot of people I thought why couldn't I do the same thing? When I make a pizza we only eat half any way so I could turn the other half into a frozen pizza or just make extras. It worked perfectly with my grain free pizza crust and comes out like a crispy and delicious thin crust pizza. 


  I made two versions... Charlie's favorite Applegate Turkey Pepperoni and olives and a BBQ chicken. Both of them I used raw pepperjack cheese. 


Frozen Pizzas
(makes 2-3 Servings per Pizza)

1 Cup Potato Starch (** Not the same as Potato flour)
- 1/2 Cup Tapicoa Starch (flour)
- 1 tsp Baking Powder
- 1/2 tsp Salt
- 1 tsp Italian Seasoning
- 1/4 Cup Olive Oil
- 1 Egg
- 1 tsp Powdered Gelatin**
- 1/3 Cup warm Water
- Whatever toppings you want 


Preheat the oven to 425 degrees.

1. In a large bowl, whisk the dry ingredients.
2. In a small bowl, or your measuring cup, mix the water and gelatin.** I have made this without the gelatin and it turns out fine.... but still use the water! :)
3. Combine the dry ingredients, olive oil, egg and the gelatin/water solution. Mix until combined... it will be a very soft- to runny dough. Pour it, or roll it, onto a baking sheet lined with parchment, make it as thin as you want. Bake 15-20 minutes. 

4. Top your pizza with whatever you want.


5. Let it cool completely on the counter or put the whole cookie sheet in the fridge. When it is cool, wrap it tightly in tin foil and store in the freezer. When you are ready to eat it- preheat the oven to 425 degrees and cook 15-20 minutes until bubbly. 

** BBQ Chicken Pizza **
- BBQ Sauce is hard to find without sugar... I make my own using equal parts of tomato paste and good balsamic vinegar with a few tablespoons of honey and a dash of cayenne. 
- Pour about 1/4 cup in 1-2 lbs of shredded chicken (I used part of a rotisserie) and toss
- Thinly slice red onions and soak them in cold water for a few minutes so they lose their "sharpness"
- Top the pizza with BBQ sauce as the sauce, the chicken and the onion... add some cheese and you're done!

Monday, February 9, 2015

Cream of Mushroom Soup--- and revamped Chicken and Rice

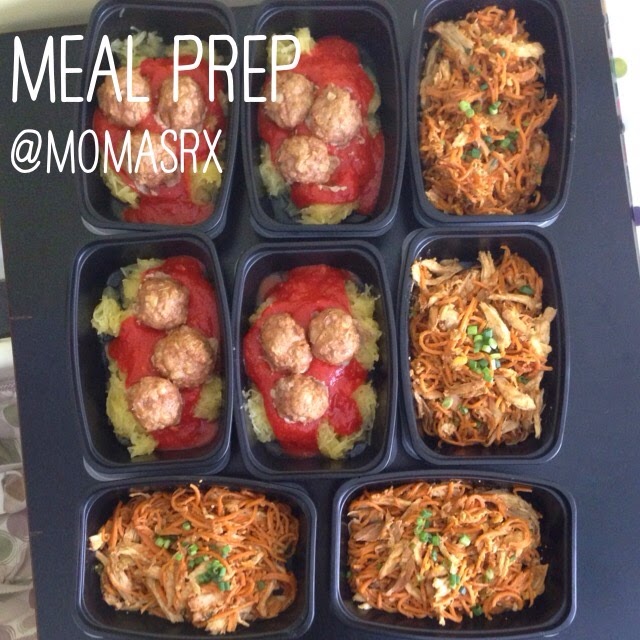
I competed this past weekend in "Swolemates" with my friend Cory. We came in fourth out of 51 teams which is awesome- but being that close to making the podium it's hard not to be a little disappointed- he's never made the podium and I only have once... boo! It was, however, one of the more fun competitions I have done, so many people from my gym were competing too- some of them for the first time. I like competing because, unlike my regular workouts, I tend to push myself harder- I realize that's something I need to work on but it's honest. I was really focusing on mentally pushing myself because it's easy to set the bar down or come off the bar. In the first workout I failed a 63lb thruster on my 15th rep of one of the sets- Even though that's not a heavy weight I know that I pushed myself as hard as I could which is a good feeling. Doing things I never thought I could do, or previously couldn't do, is very motivating. I thought I was feeling ok the next day, but I'll tell you what- I am barely walking today... so many squats! :) 


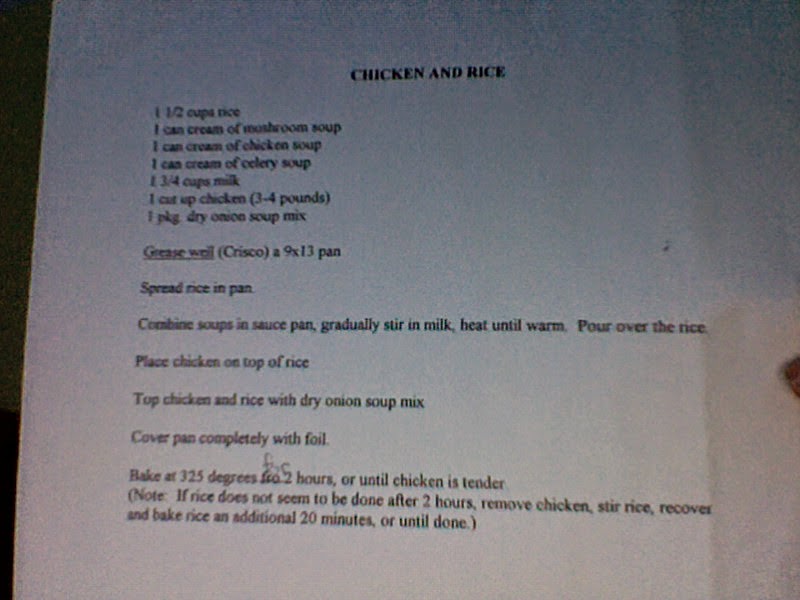
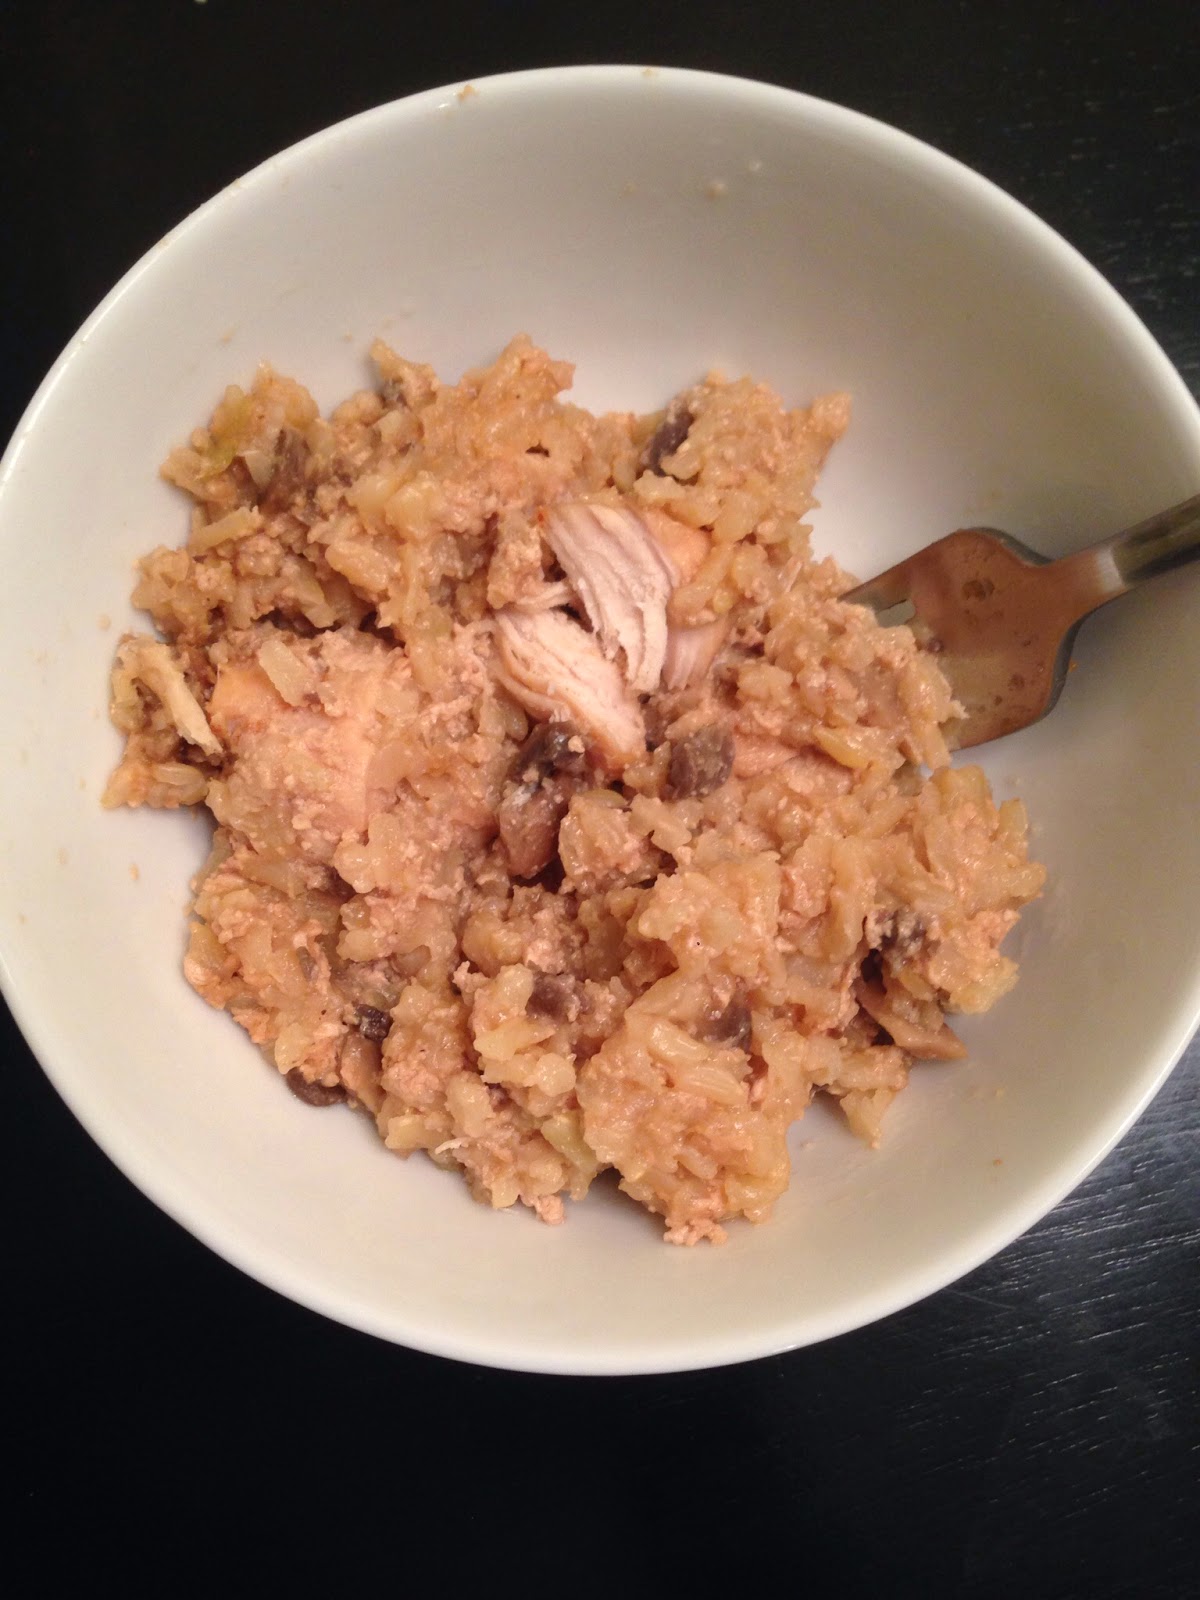
Charlie is a big fan of rice dishes and I have been trying to "revamp" some of the family favorites to make them a little less processed. "Chicken and Rice" reminds me completely of my dad... this is the original recipe:

calories 447
% Daily Value *
Total Fat 10 g15 %
Saturated Fat 3 g16 %
Monounsaturated Fat 14 g
Polyunsaturated Fat 10 g
Trans Fat 0 g
Cholesterol 134 mg45 %
Sodium 1079 mg45 %
Potassium 569 mg16 %
Total Carbohydrate 48 g16 %
Dietary Fiber 2 g9 %
Sugars 4 g
Protein 54 g107 %
Vitamin A3 %
Vitamin C0 %
Calcium34 %
Iron67 %
* The Percent Daily Values are based on a 2,000 calorie diet, so your values may change depending on your calorie needs. The values here may not be 100% accurate because the recipes have not been professionally evaluated nor have they been evaluated by the U.S. FDA.

The only thing I changed was making my own cream of mushroom soup and not using the canned versions. The recipe below makes enough for the whole recipe.

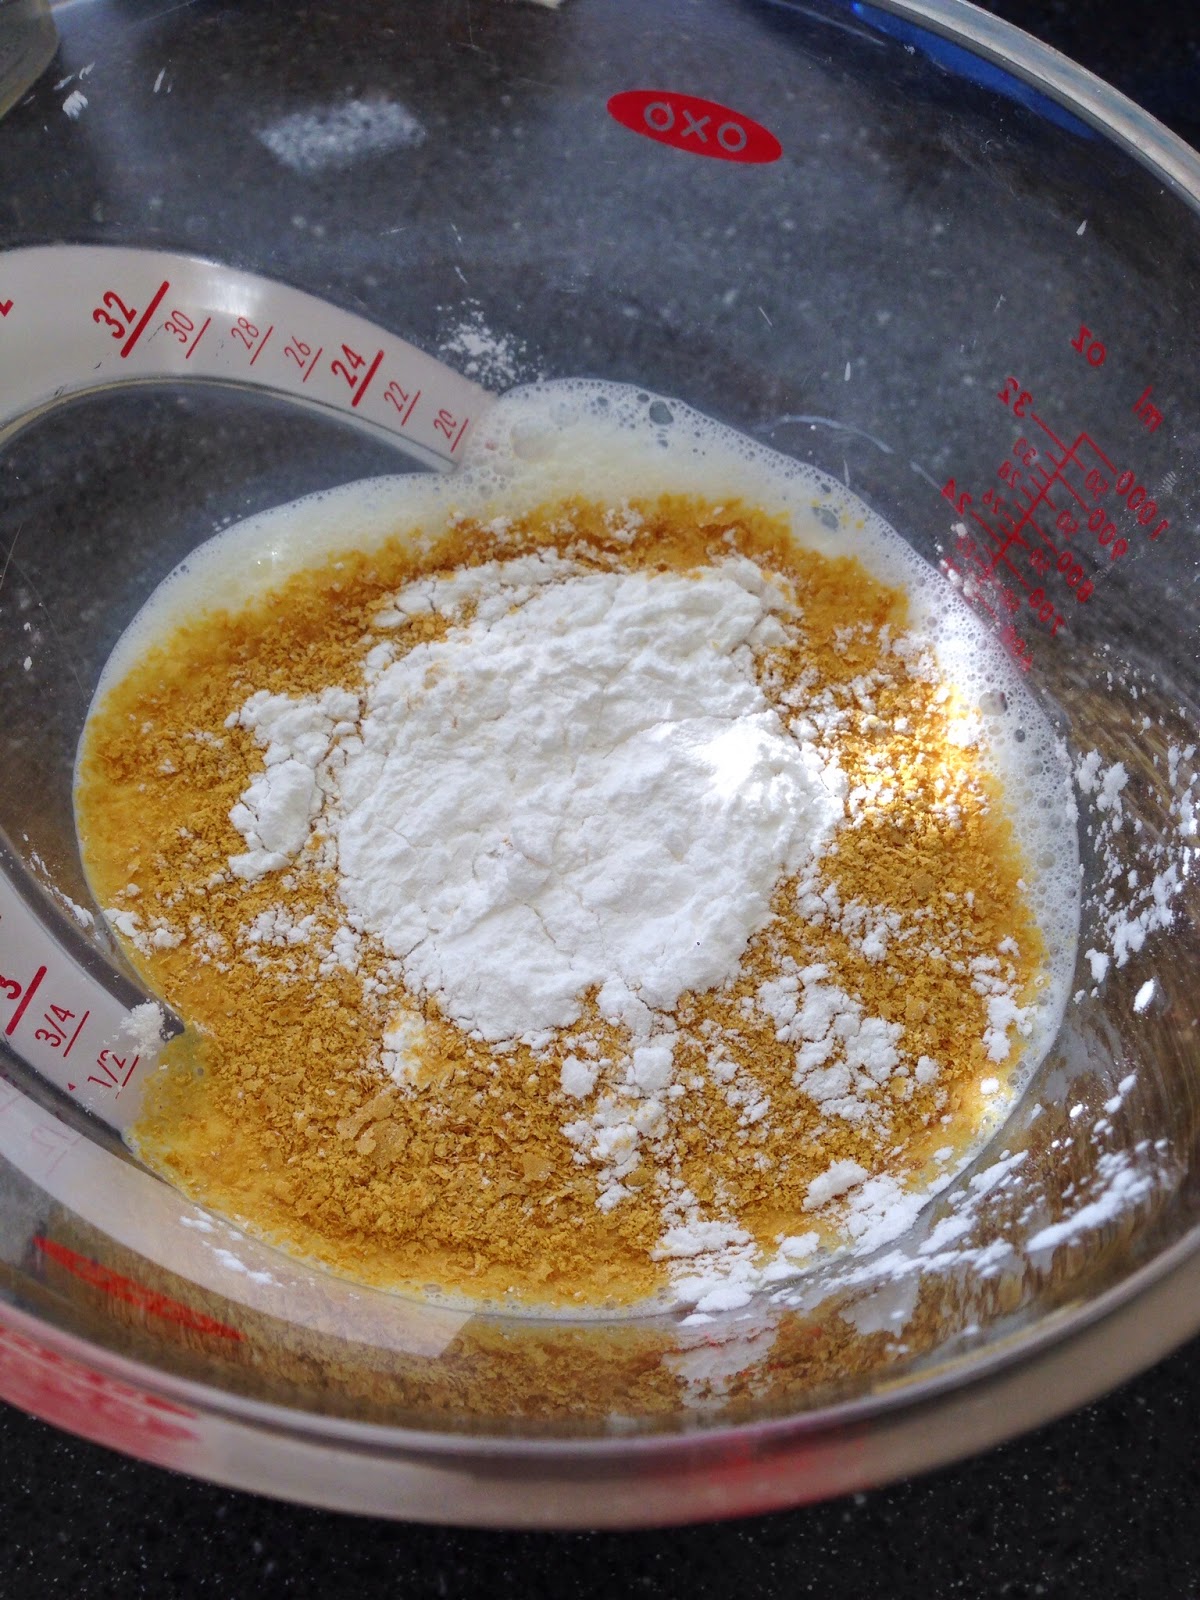
I had forgotten about nutritional yeast until my mom gave me a big container of it. I used to use it all the time when I was a vegetarian because it gives food a "buttery" or "cheesy" flavor. It is actually deactivated yeast and considered a complete protein- fortified nutritional yeast contains B12 which was important when I didn't eat animal products. It isn't expensive and can be found at most grocery stores- it looks like yellow flakes! I used it in this because I thought the soup could use the richer flavor and I have recently been putting it in my pizza crust among other things. 

This soup could be turned into any "Cream of ____" soup... just swap out the mushrooms for whatever kind you need. 

Cream of Mushroom Soup

(Printable Version)

- 2 Tbsp Olive Oil
- 1 Sweet Onion, finely diced
- 1 Garlic Clove, minced
- 12-16 oz White Button Mushrooms, trimmed and chopped
-  4 Cups Milk (any kind)
- 1 Cup Chicken Stock
- 3 Tbsp Arrowroot Powder
- 3 Tbsp Nutritional Yeast
- Salt and Pepper to taste

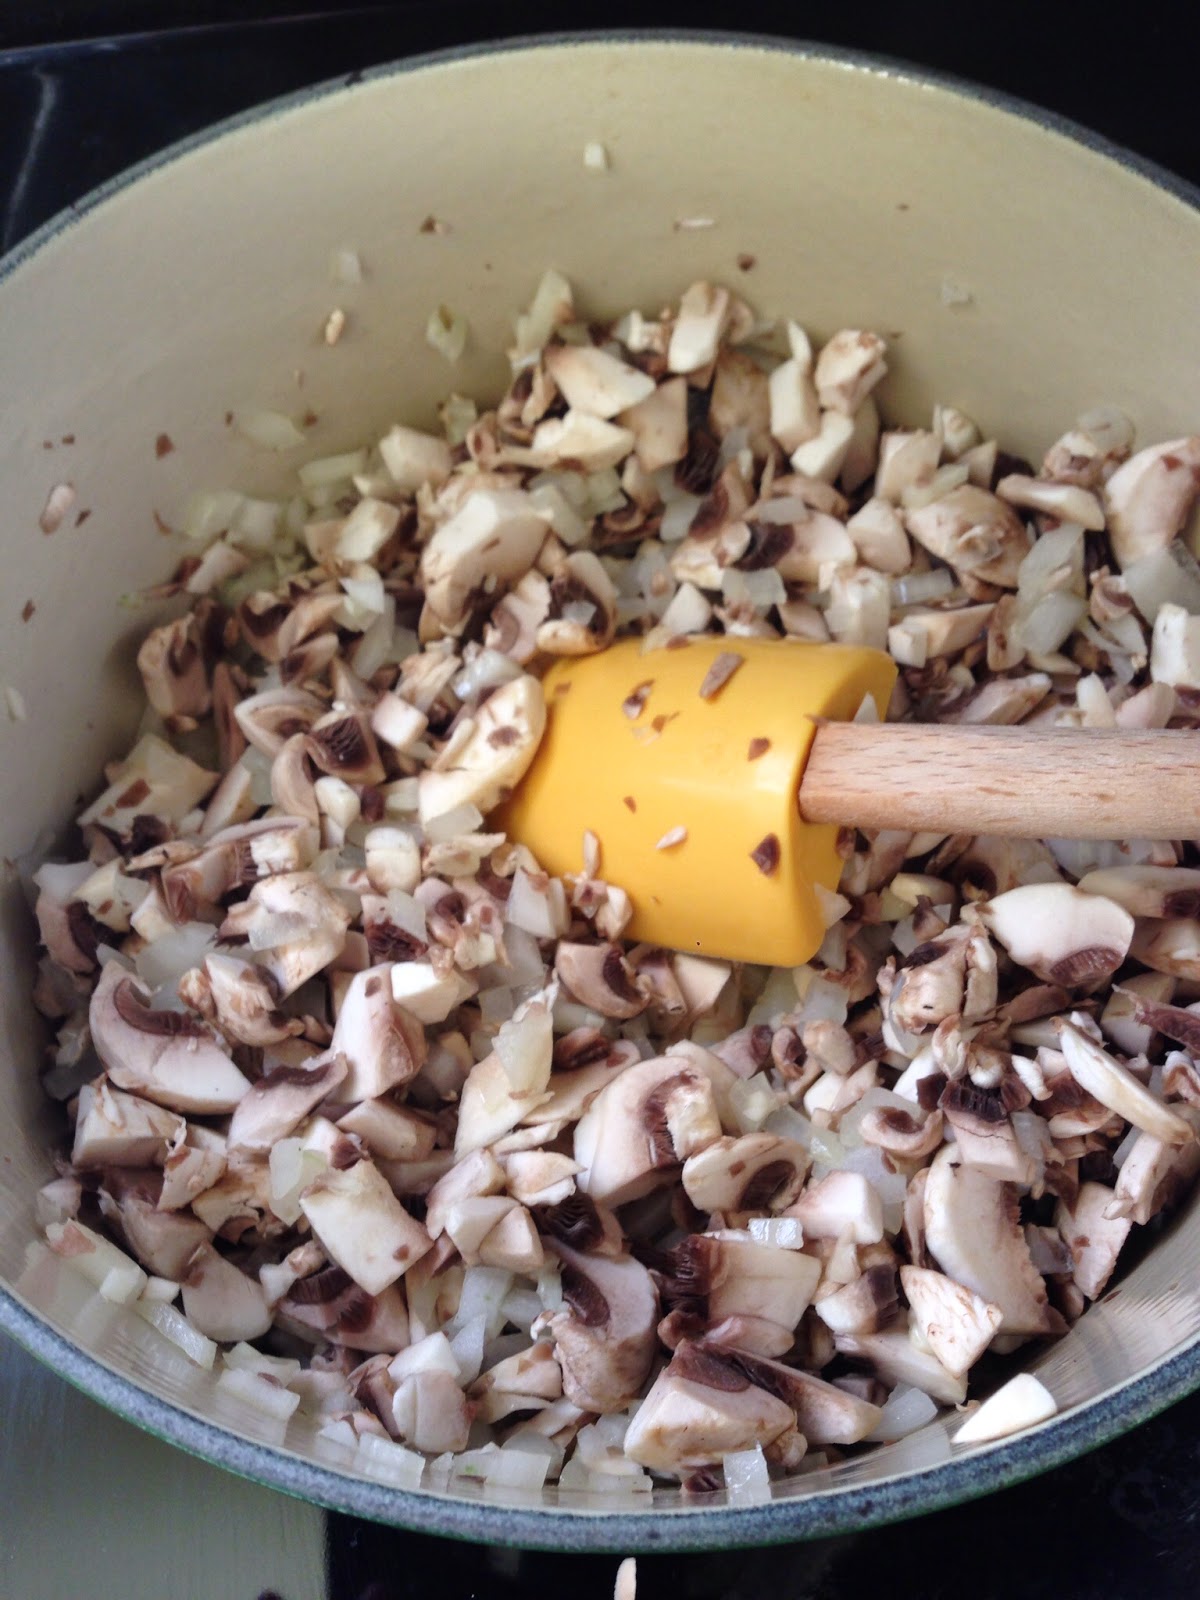
1. Heat the oil in a large sauce pan over medium heat. Add the onions and garlic. Saute until they start to soften, then add the mushrooms. Add a pinch of salt and saute 5-7 minutes until they are tender.


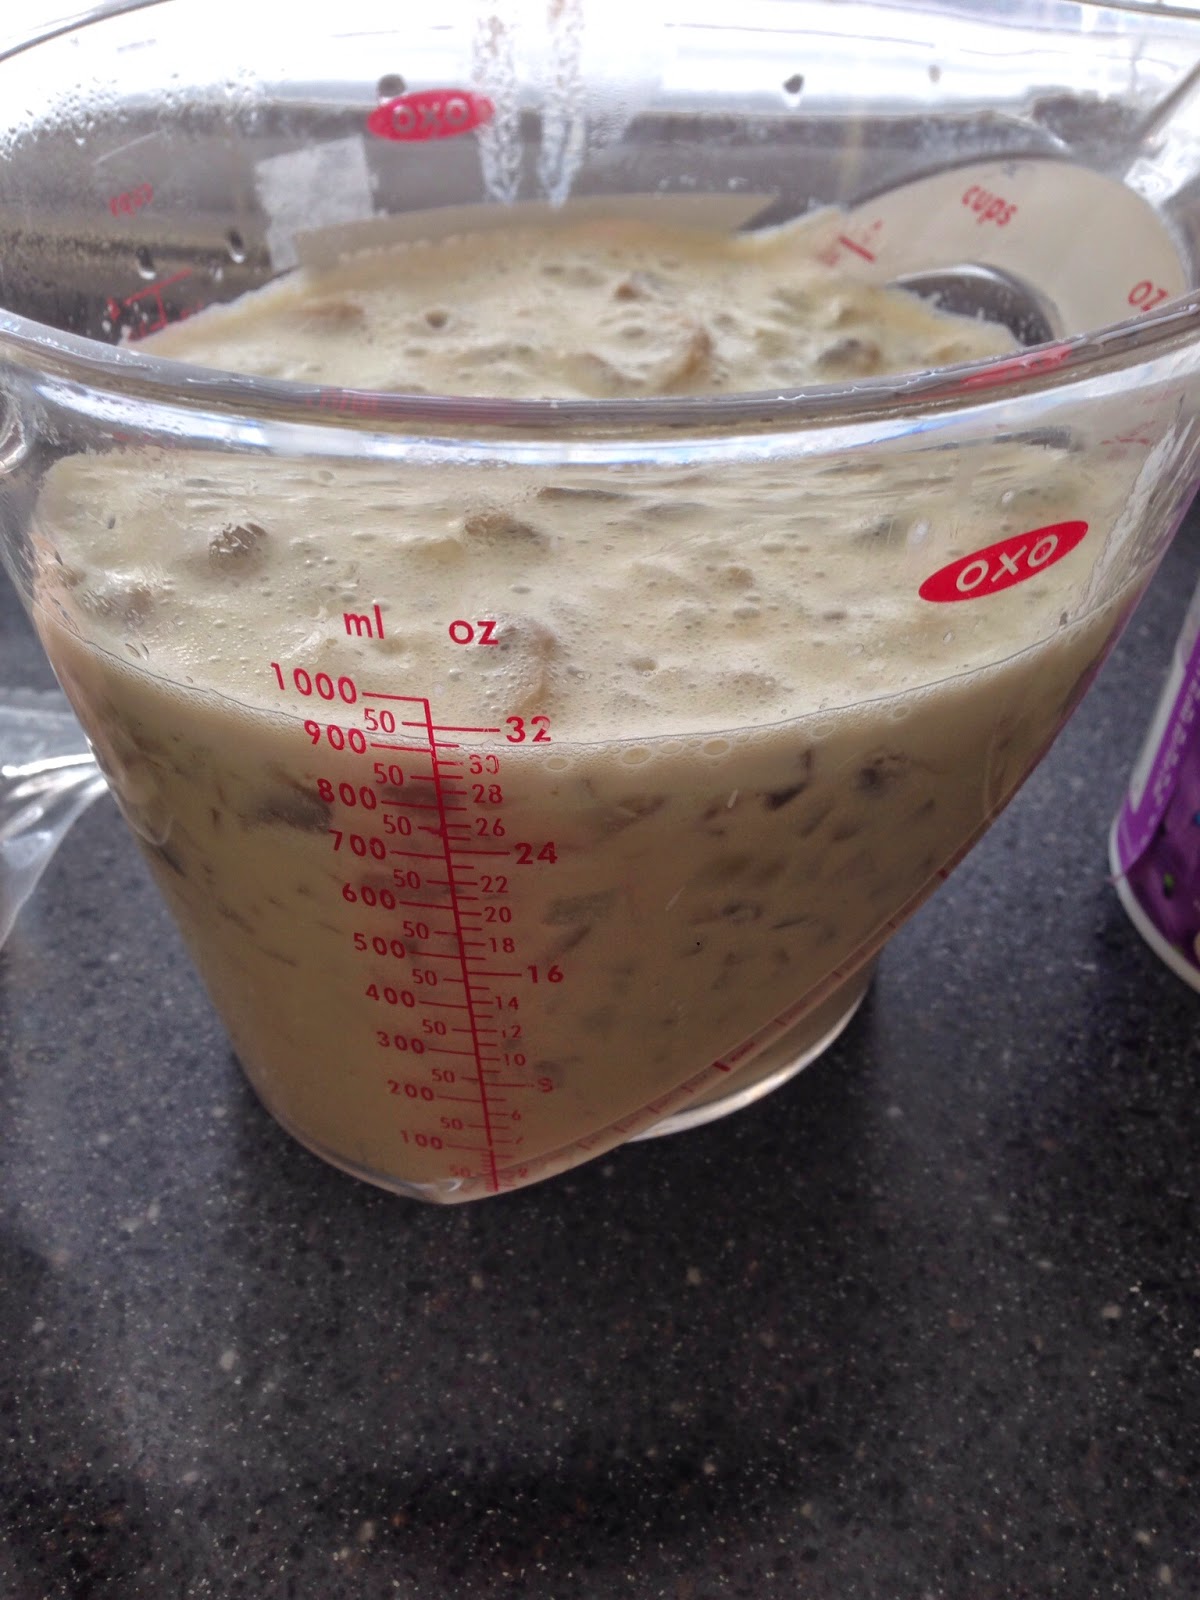
2. Whisk the liquid ingredients, yeast, and arrowroot powder. Slowly add them to the pan as you stir. Let this cook until it starts to thicken, stirring occasionally. You can eat this as is, or use it in the recipe below :)

*You can puree it with an immersion blender if you want , but I like the pieces of mushroom * 


Chicken and Rice

- 1 1/2 Cups Rice (not quick cooking)
- 4 Cups Cream of Mushroom  (the full recipe from above)
- 1 3/4 Cups Milk
- 4 Chicken Breasts- you can cut them ahead of time but you risk dry chicken :) 
- 1 Package Dry Onion Soup Mix (sorry... no substitute found yet!)

Preheat oven to 325 degrees.

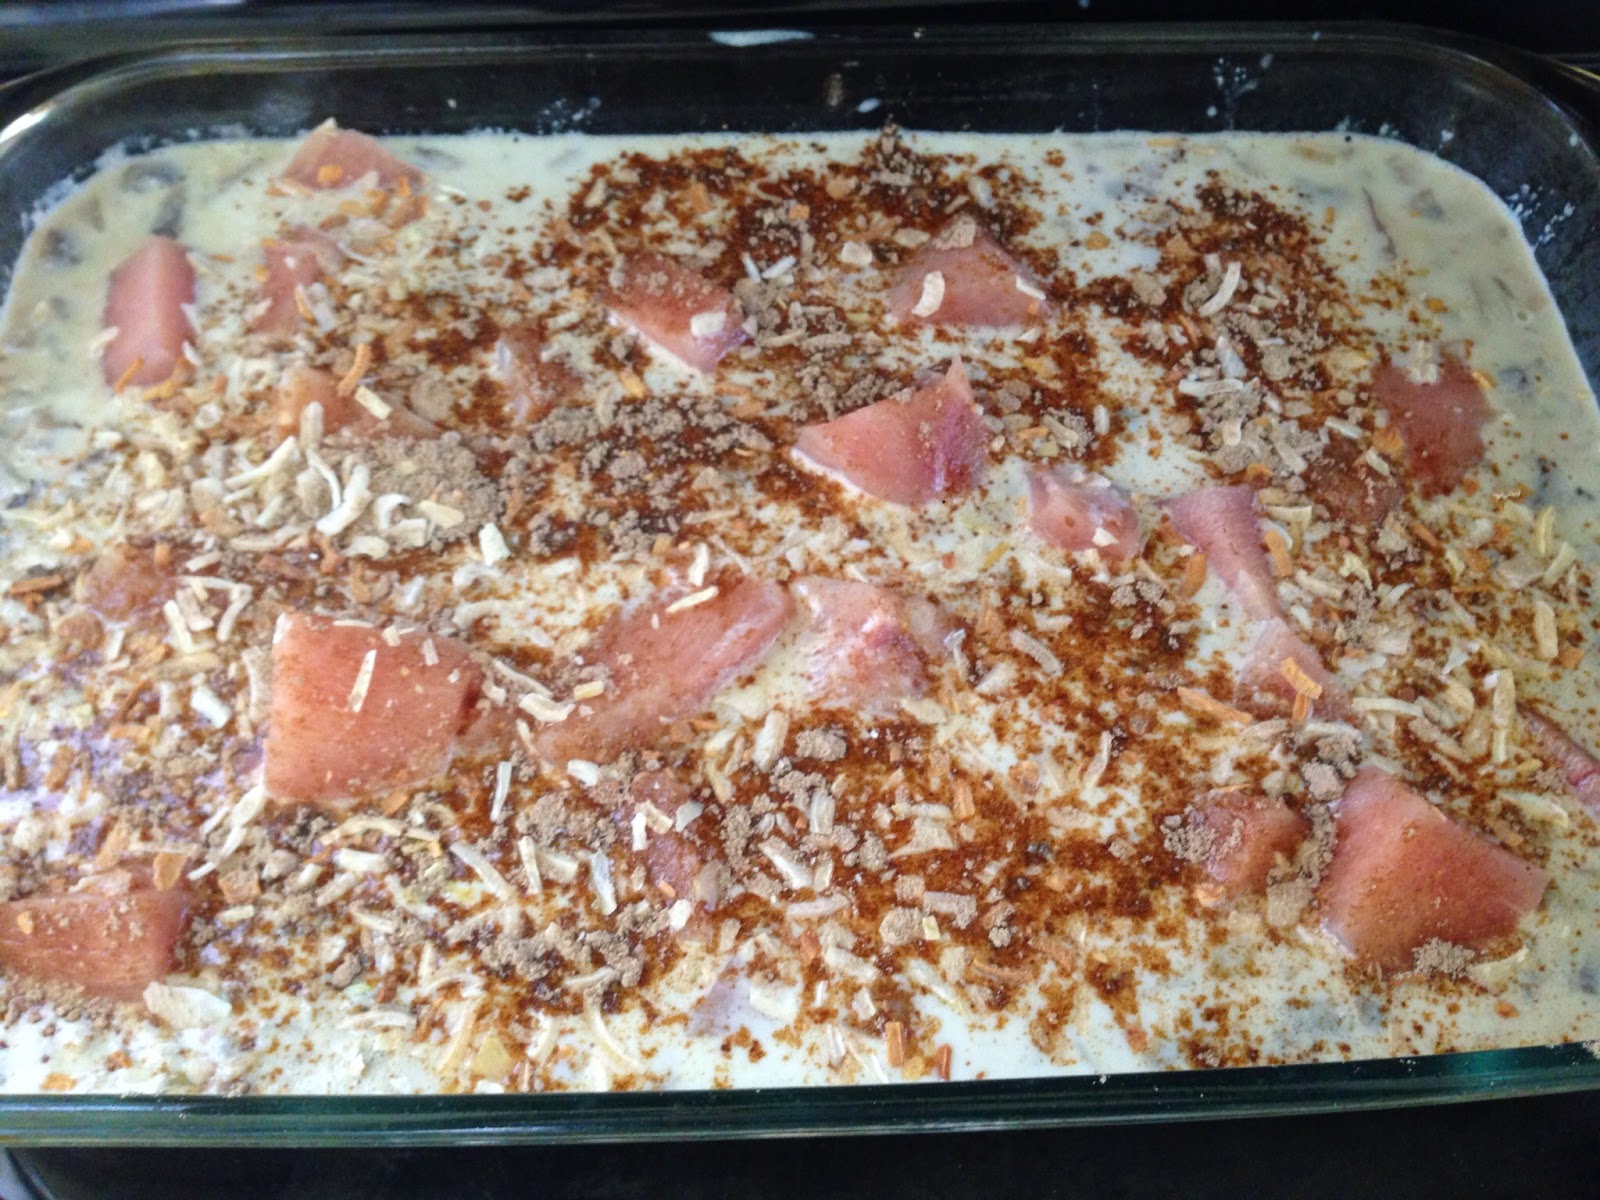
1. Grease a 9x13 pan REALLY well. Pour in the rice, cover with the cream of mushroom soup and milk. 

2. Place the chicken on top of the rice and sprinkle the dish with the soup mix. 


3. Cover the pan completely with foil and bake for 2 hours. If after 2 hours the chicken is done but the rice is not, remove the chicken, stir, and recover baking an additional 20 minutes. Cut or shred the chicken and add it back to the pan. 


Friday, February 6, 2015

Broccoli and Bacon Stuffed Potatoes- and what's with your blog name??

So here's the deal with the name of my blog... most people who do CrossFit understand what "Rx" means, but for those that don't, I am not referring to a prescription nor do I consider myself medicine of any kind- I actually very rarely even take medicine. :) “As Prescribed” or “Rx” for those unfamiliar with CrossFit, is something that most CrossFitters strive for. It is always exciting to put that "Rx" after your name on the score board. What do the two letters really mean?

Greg Glassman, founder of CrossFit, says it best, "In the eyes of a coach, “Rx” means the athlete held themselves to the highest standard in weight, reps and skill. For example, “Fran” requires the athlete to perform 21-15-9 repetitions of thrusters at 95 pounds for the guys and 65 pounds for the ladies and pull-ups. In order to have “Rx’d” “Fran” (yes, there are a lot of quotes here), an athlete must have used the weight posted, performed the required number of reps in the order listed and also, and here comes the integrity part, done each rep to the required movement standards.The “Rx” is one of the things that most all Crossfitter’s strive for. So being that this is of importance for the competitive spirits out there, there is a high standard to follow. Just because you went “Rx” on a weight does not mean that you get to put “Rx” by your name."

My play on words with the concept of doing something "as prescribed" is that I am striving to do everything to the best of my ability as a mom and hold myself to the highest standards of what I think it takes to be a good mom. It is not always obtainable, but neither is a prescribed CrossFit workout for me... it's just a goal to shoot for. Just because I can do some movements and weights "prescribed" doesn't mean I can do all of them- and such is life being a mom.... every day is a new challenge and every situation I am in with her is a new "workout" so to speak that I work towards being good at. Once you are doing a workout prescribed it doesn't mean that you are done... you are still trying to be better than you were the last time... you never stop trying to be the best athlete you can be and you never stop trying to be the best parent.

I made this "recipe" if you want to call it that a while ago but never posted it until I made it again. The idea came from my Twice -Baked Sweet Potatoes. So here's the situation... I have run out of food and I desperately need to get to a store. I apologize for the pictures being dark, I was cooking at night which is what often happens when you run out of food and need to pack a lunch after your kids have gone to bed. I made this for dinner tonight and for lunch the next day because bacon, broccoli and potatoes... meat, vegetables, starch... good to go. It also doesn't take very long and requires three ingredients- I put the potatoes in the oven to cook while Charlie had her bath and I got her into bed- then the actual cooking took about 15-20 minutes from start to finish. If you have spinach, I would add that :) And guess what?! Whole30 approved!

Broccoli and Bacon Stuffed Potatoes

(Printable Version)

- 2 Sweet Potatoes, baked and cut in half (Pierce with a knife, bake at 400 degrees for 40min-1hr)
- 4 Broccoli Crowns, about a pound, finely chopped
- 6 Pieces of Bacon (1/2lb) cut into 1/2 inch pieces

1. In a skillet over medium heat, cook the bacon until crispy. Chop the broccoli while deliciousness this is happening. 


2. Add the broccoli to the bacon and saute until bright green- about 5-10 minutes- taste here for salt and pepper. 


3.  Top each half of the potato with the broccoli and bacon mixture. Viola! Dinner. :)


Monday, February 2, 2015

Pancake Muffins

We just got hit with over a foot and a half of snow... 3rd biggest snow fall in our area's history.... so what does that mean for us?! Well since I am a teacher I have the glorious thing known as "snow days" although most people couldn't make it to work today even if they were supposed to. I am sore from the weekend's workouts, but the massive amount of snow made sure my snow blower couldn't handle it and I got a great workout in shoveling. When it warmed up a bit we put on all of our snow gear and played in the yard and then I did a couple of sled pulls around the blocks... I don't know if it was the boots, the snow, or pulling a child but I was panting and sweating. Love getting a workout in while having fun. People can say all they want about CrossFit, but shoveling heavy and deep snow is so much easier when you are in good shape and strong enough to do it.... not to mention have the energy to play with your kid afterwards too. :) Functional fitness at its finest.


It was one of those incredibly sunny but deceivingly cold days- my Grandpa Guernsey's favorite. My little mini-me was so excited to play in the snow she wouldn't do anything but her squishy smile face of pure joy... and yes, I am aware I have big teeth...


Since it was a snow day I thought we could make something special for breakfast- I re-did my pancake recipe to make them fluffier and put the batter in muffin tins to make them more fun. Charlie and I made blueberry for her and chocolate chip for me... you could top them with whatever you want and the glorious thing is that everyone can top their own!


They were a hit! She ate two plus extra blueberries and extra syrup.


Pancake Muffins

(Printable Version)

(Makes 12 Muffins, or 24 minis)

- 3/4 Cup Coconut Flour
- 1/4 Cup Tapioca Flour
- 1 1/2 tsp Baking Powder
- 2 Tbsp Raw Honey
- 1 Cup Milk (any kind you want... or water)
- 3 Eggs
- Pinch of Salt

Toppings!
- Blueberries
- Enjoy Life Chocolate Chips
- Cinnamon
- Nuts

Preheat the oven to 350 degrees.

1. Whisk the dry ingredients together, add the wet ingredients and whisk until smooth.


2. Butter, line or oil your muffin tins. Pour the batter in each one, 1/2-3/4 full. Add the toppings. If you are using blueberries or chocolate chips push them in a little. Bake 15-20 minutes. A toothpick inserted in the center should come out clean, and the tops should be firm, or bounce back when pressed.